Lesson Plan: The Polygon in you!
Unit theme: Polygons
Lesson: Creating art while discovering The Polygon In You!
Integrated subject: Geometry
Level: 2
Projected Time: 30 minutes
Lesson: Creating art while discovering The Polygon In You!
Integrated subject: Geometry
Level: 2
Projected Time: 30 minutes
Lesson Overview:After reviewing polygons and learning about Tim Biskup's Eagle, and Beast, students will create their own contemporary, polygon portrait.
|
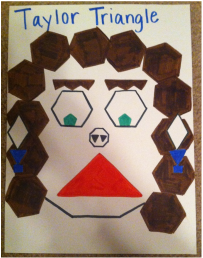
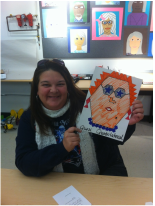
teacher exemplars: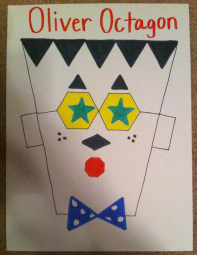
|
Materials Needed (for a class of 18)-18 pieces of 80lb drawing paper (white)
-Markers (10 in a pack) -Stencils (cut out) of various polygons (created by the teacher) -Pencils -Sharpies (if students want to trace certain parts of portrait)
|
Vocabulary Terms:Geometry:Polygon: A closed figure made up of three or more line segments.
Triangle: A three-sided polygon. Quadrilaterals: A four-sided polygon. Pentagon: A five-sided polygon. Hexagon: A six-sided polygon. Heptagon: A seven-sided polygon. Octagon: An eight-sided polygon. Nonagon: A nine-sided polygon. Decagon: A ten-sided polygon. ART:Overlapping: when an object overlaps another object it appears closer, while the object behind seems farther away
Composition: placement of elements on the picture plane Primary colors: blue, red, yellow Secondary colors: orange, green, and purple (made from mixing two primary colors) Geometric shape: man-made shapes such as circles, squares, rectangles, and triangles |
Standards:
Grade 2, mathematics:CCSS 2.G.A.1: Recognize and draw shapes having specified attributes such as a given number of angles or a given number of equal faces. Identify triangles, quadrilaterals, pentagon, hexagon, and cubes.
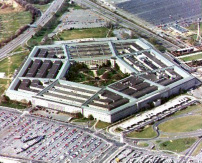
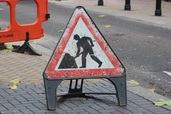
Visual culture component:POLYGONS CAN BE FOUND EVERYWHERE!!
Artist connection:Tim Biskup is an American, contemporary artist who works with polygons. His polygon series was inspired by visual hallucinations that he experienced while suffering from migraine headaches.

Eagle, 2010

Beast, 2010
Resources:http://www.artic.edu/aic/resources/resource/1022
-Lesson Plan-Finding Polygons www.mathsisfun.com/definitions/index/html - math vocabulary www.corestandards.org/Math/Content/2/G - Common Core State Standards (Geometry) https://www.google.com/imghp?hl=en&tab=wi&ei=zR95UtjOOdGosQSr5IGoBg&ved =0CAQQqi4oAg -images for the visual culture component http://omgposters.com/2010/04/08/polygon-series-art-prints-by-tim-biskup-onsale-info/ -artist connection http://ed.sc.gov/agency/se/InstructionalPractices-and Evaluations/documents/AcademicStandardsfor VisualArts.pdf -SC Art Standards |
grade 2, visual arts:Standard 1: The student will demonstrate competence in the use of ideas, materials, techniques, and processes in the creation of works of visual art.
Indicators: VA2-1.1: Identify the materials, techniques, and processes used in a variety of artworks. VA2-1.2: Discuss the reason that different elements and principles of design each cause their own distinct response in one who is creating or viewing works of visual art. VA2-1.3: Use and combine a variety of materials, techniques, and processes to create works of visual art. VA2-1.4: Use all art materials and tools in a safe and responsible manner. Standard 3: The student will examine the content of works of visual art and use elements from them in creating his or her own works. Indicators: VA2-3.1: Describe the content in a work of visual art. VA2-3.2: Select and use subject matter, symbols, and ideas to communicate meaning through his or her artworks. VA2-3.3: Discuss the ways that choices of subject matter, symbols, and ideas combine to communicate meaning in his or her works of visual art. Standard 6: The student will make connections between the visual arts and other art disciplines, other content areas, and the world. Indicators: VA2-6.1: Identify similarities and connections between the visual arts and other subjects in the school curriculum. VA2-6.2: Discuss and compare the similarities and differences between the visual arts and other art disciplines. VA2-6.3: Discuss ways that skills from other areas of the curriculum are used in the visual arts. Procedure:-Prior to beginning the lesson, I will distribute the materials: 18 pieces of 80lb drawing paper (white), markers(10 in a pack), stencils (cut out) of various polygons, pencils (if needed) and sharpies. (2 minutes)
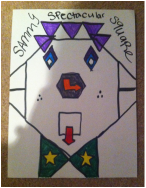
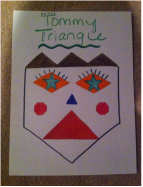
-I will open the lesson by introducing my theme-asking students-Where do they see polygons? In the classroom, in their homes, in the environment-introducing my lesson. (1 minute). -Then, show the power-point, reviewing geometry/art terms, leading into Tim Biskup's Polygon series. (2-3 minutes) -The students will have 15-20 minutes to create their polygon portrait. STEP 1: Decide who you want to create a portrait of and which polygons you want to use for the eyes, mouth, hair, nose, ears, etc. You must use at least four different polygons. STEP 2: Trace your face shape onto your sheet of drawing paper. Using the polygons you selected, trace them onto the face shape to create your portrait. Color your portrait using at least one primary or secondary color. STEP 3: Title your portrait: the first and last name has to begin with the same letter and the last name has to be the name of the polygon used for the mouth. STEP 4: Clean up your work areas. Returning markers to correct bins & stacking other materials, neatly, on your desks. (2 minutes) STEP 5: Closing the lesson, I will ask the students which polygons they chose to incorporate in their portraits. Sum up the objective: Classifying polygons by the number of sides they have. If time permits they can show their artwork to their classmates. (2 minutes) |


Reflection:
Three things that went well:
1. Once I introduced my theme, my lesson went very smoothly (interaction with my students (peers) made this possible.
2. Students were able to successfully identify numerous polygons and define them (the table created in my power-point was straightforward, and kid-friendly). 3. My peers said my lesson was very creative. They loved the power-point and they loved creating the polygon portraits (my time and effort put into this lesson plan made this possible). |
Three things that could have been different:1. When distributing materials, I could have allowed the students to choose their face shape. If I were to teach this lesson again, I would do such.
2. I instructed the students to use only markers; a few of them said I should have given them an option. Next time, I will have crayons and colored pencils available for the students to use. 3. In my feedback, my students (peers) said I should have considered placing newsprint under their drawing paper if the markers bled through. When teaching this lesson again, I will place news print under each students drawing paper. |
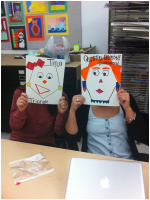
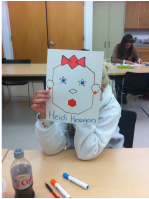
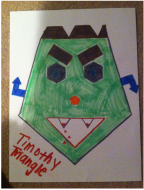
Student examples:
|
|
|
|
|
|
